I am working on my own game which called for a lot of colored lights. To make a light ‘glow’ in Unity URP setup, the lights need emission and post-processing bloom setup in the scene. Both sounds reasonable and easy to setup. Until you try to tell the different light colors apart.
The image on the left is my first shader with a simple Fresnel effect. The image on the right shows the same lights in the same scene with the emission shader that I am documenting here.

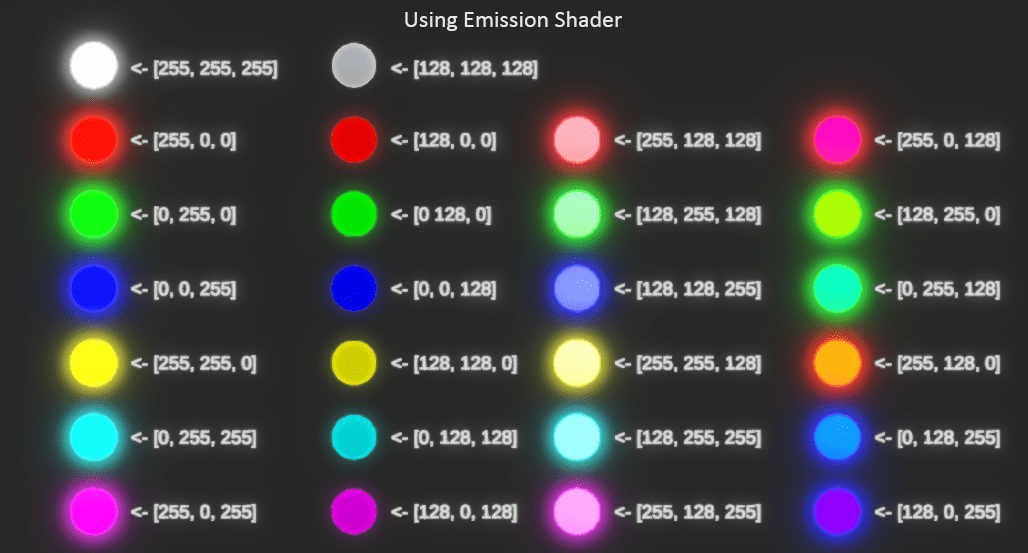
To gets tarted, here is the shader I started with. The RGB channels were recombined into the base color and used to color the Fresnel effect. The Remap node is to take out the “hole” in the center of the light. Some color came though, but a lot of the colors look pale and hard to tell apart. That wouldn’t work for the game I am making.

I tried looking up tips and help on the internet and wasn’t able to find a solution to my problem. So I asked “Gemini” for help. It was hit and miss for while. But after about two week of back and forth. I got my final version of the shader that give me what I wanted.
Colored Light Emission Shader
Here is the explanation on what each sections does and why.
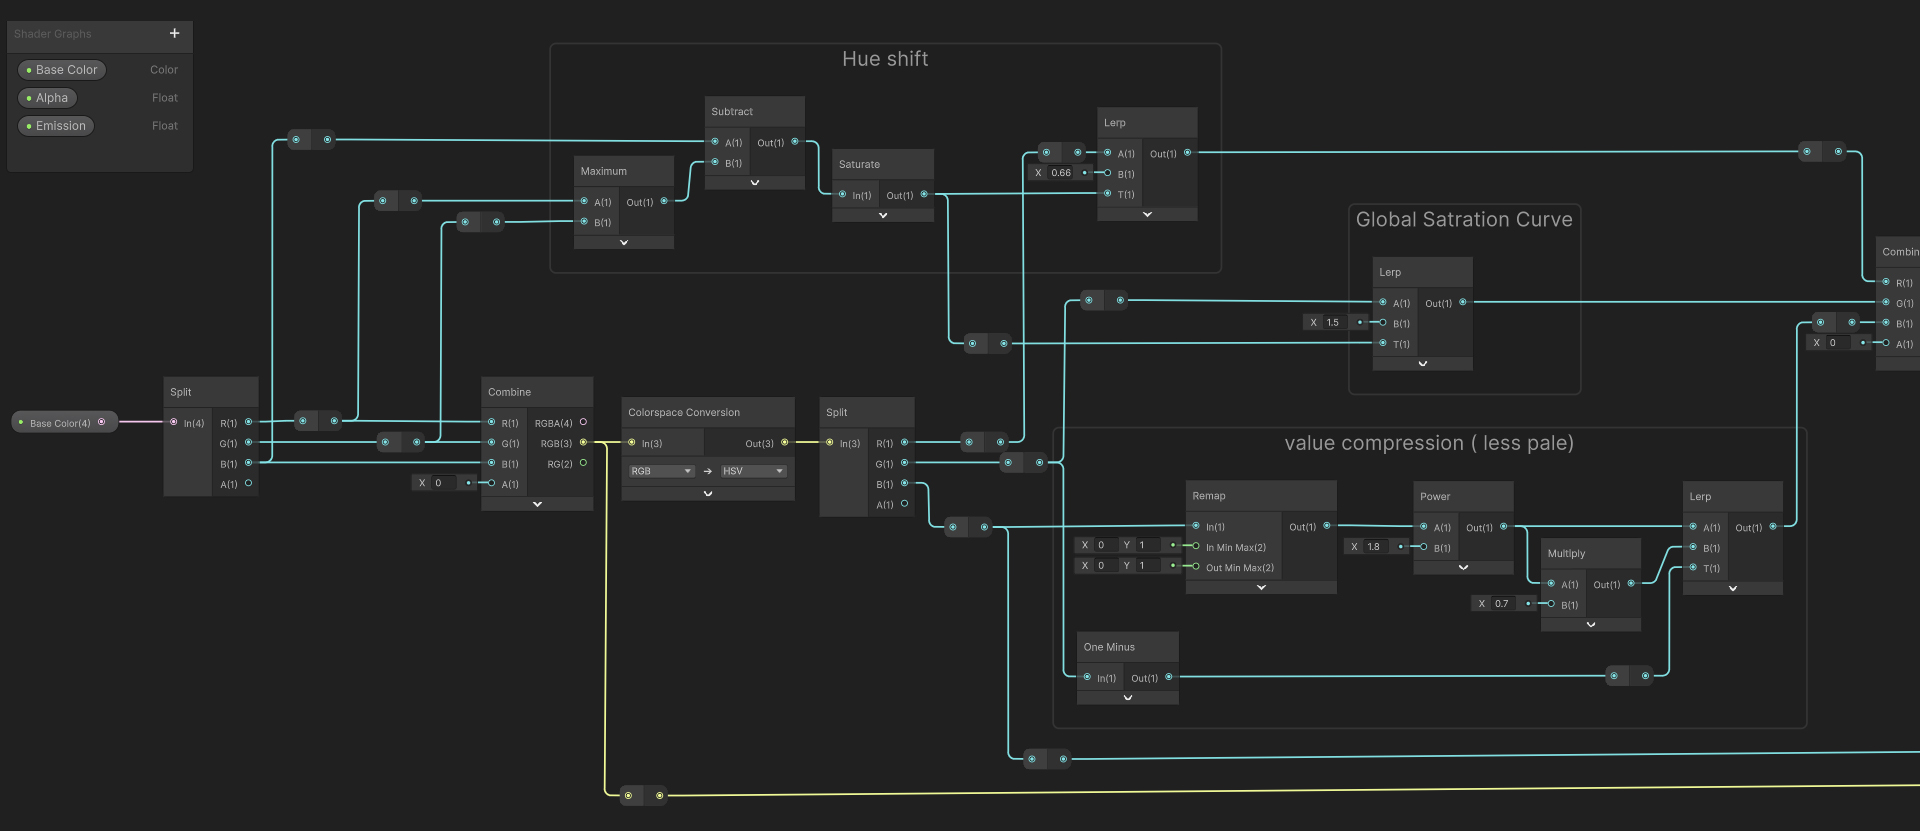
1. RGB to HSV Conversion
- The first step is convent the RGB color into HSV so I can make adjustments to Huge, Saturation and Value/Brightness separately.
- NOTE: I split out the Alpha to work with my code.
2. The Hue Shift Section
- This stops the bright colors from drifting into pale “minty” color or look washed-out.
- It takes the raw RGB channels and uses a Maximum and Subtract logic to find the “purest” version of the color. By using that Lerp set to 0.667, I’m telling Unity to favor the actual hue over the raw light intensity. It keeps my Greens “leafy” and my Blues “deep” even when the emission is high.
3. Global Saturation Curve
- This is my master control for how “vibrant” the light looks.
- It uses a Lerp to blend between a flatter version of the color and a highly saturated version. This ensures that as the light gets brighter, it doesn’t just lose all its color and become bleached; it stays rich.
4. Value Compression (Less Pale)
- This give the color of the light a “punch”. It stops the lights from looking milky or “grayish” in the mid-tones.
- I’m using Remap and Power nodes to crunch the values. By pushing the darker parts of the color down and pulling the bright parts up, I’m creating high contrast. This makes the light feel more “solid” and less transparent.
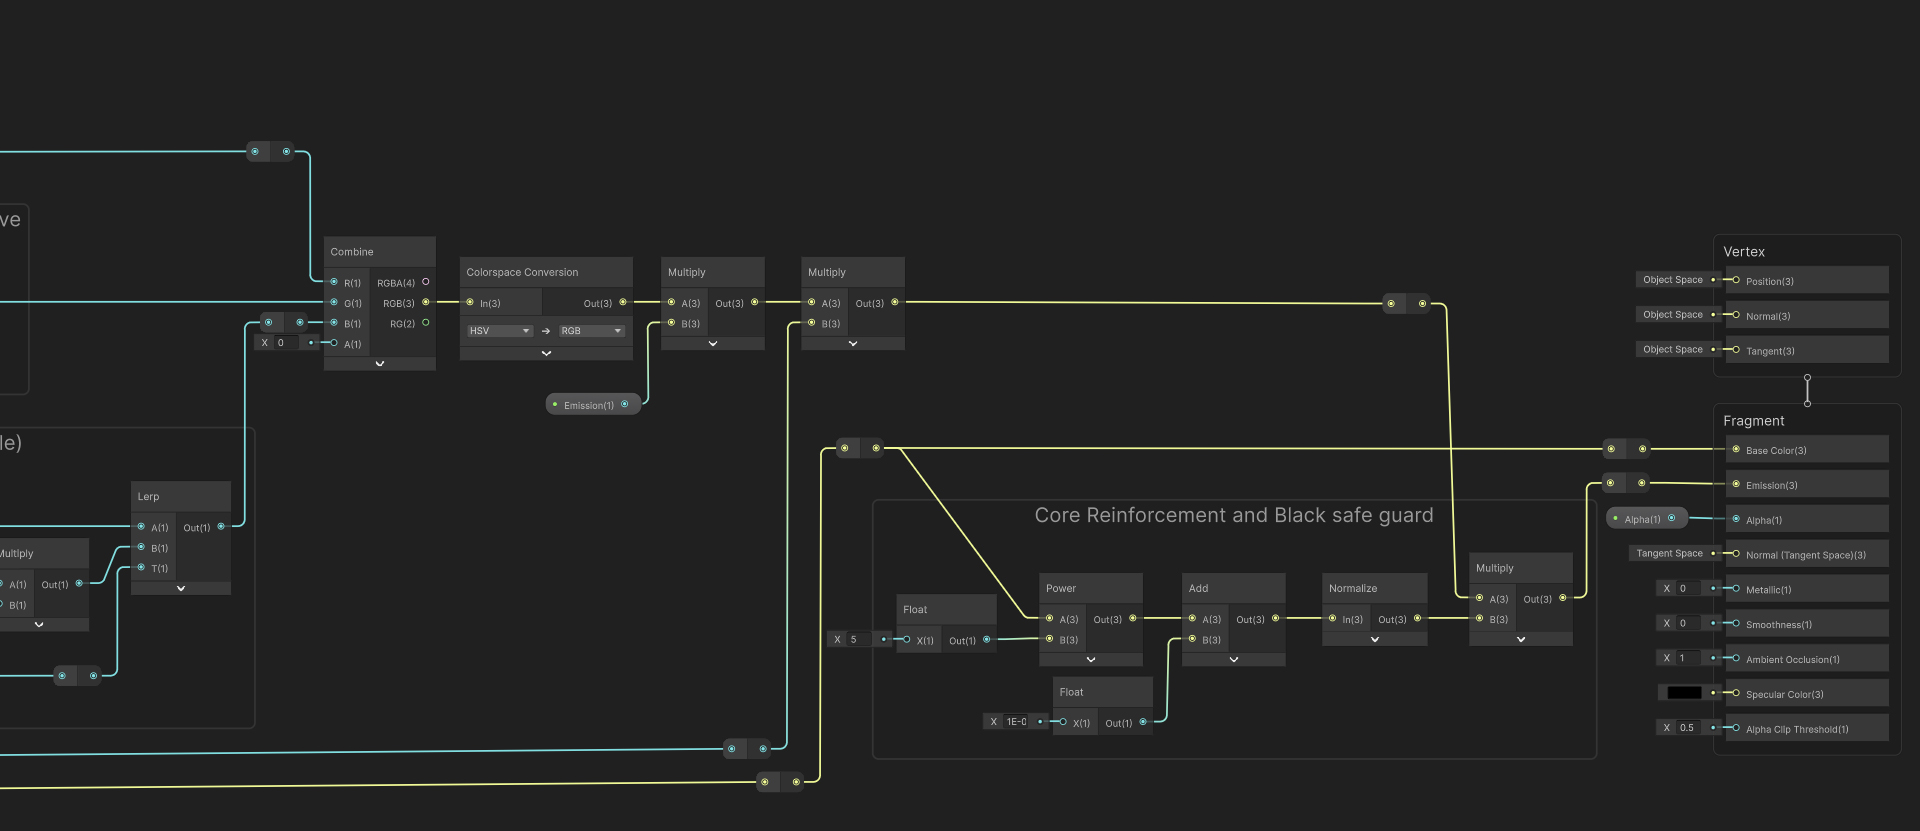
5. Convert Colorspace Back to RGB
- This is to get the color ready for the final adjustments.
- I multiplied the Emission amount to the converted RGB color to give me control on the Emission amount. NOTE: I have my emission for the lights set at 30 on the material since it works well with my Global Volumes (see Reference section).
6. Core Reinforcement and Black Safe Guard
- This is the big fix for the pink light and fix the bug where shader breaks on black color.
- The Power node “crushes” the secondary channels. For pink, it keeps the Red high but pushes the Green and Blue way down so they don’t mix into white.
- The Add (1E-05) node is the Black Safe Guard. It adds a tiny, invisible amount of math so that pure black doesn’t make the shader try to divide by zero and “explode” into black holes.
- The Normalize node makes the color tint “full strength” regardless of how dark the base color is. This is why the [128, 0, 0] red still has a great halo even though it’s technically a “dark” color.
- The final Multiply takes all that emission energy and forces it through the “filter” of the reinforced color. This is what gives out those beautiful colored cores instead of just white centers.
Reference:
Here is the Global Volume for my scene.

Here is what my material settings are.
